

1. Install Node.js 20+
CC GUI requires Node.js major version ≥ 20. This path is only for the extension. It does not change the Node version in your project terminal. Your project can keep using Node 16 or 18. Install a separate Node 20+, then paste the executable path into CC GUI.1
Install a separate Node 20+
Use the official installer, nvm, fnm, or your system package manager. Then run this in that environment:Copy the full path. On Windows it must point to
node.exe.2
Add it to CC GUI
Open CC GUI → Settings → General → Environment, paste the path into Extension-only Node.js path, then click Save.You can also search
ccGui.nodePath in VS Code settings. If you leave it empty, the extension tries to detect node on your PATH.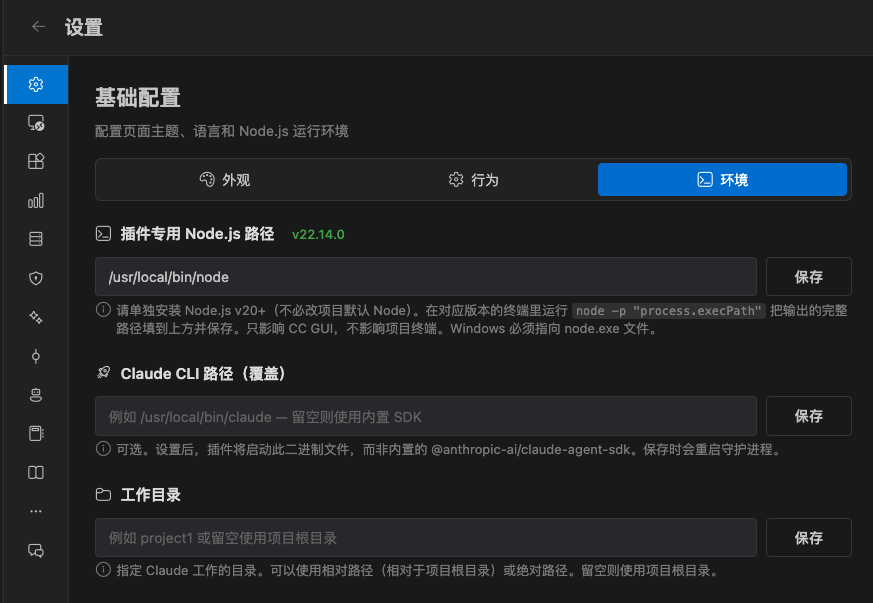
2. Install the Claude / Codex SDKs
Claude Code and Codex need their SDKs. The extension installs them under your user directory:- Claude:
@anthropic-ai/claude-agent-sdk - Codex:
@openai/codex-sdk
1
Open SDK dependencies
In CC GUI, click Settings → SDK dependencies.
2
Install what is missing
Click Install for each missing SDK. You can also select them in the setup wizard and let it install them.
3
Confirm the version
After install you should see the current version. Codex also checks CLI integrity. If that check fails, the status stays Not installed.
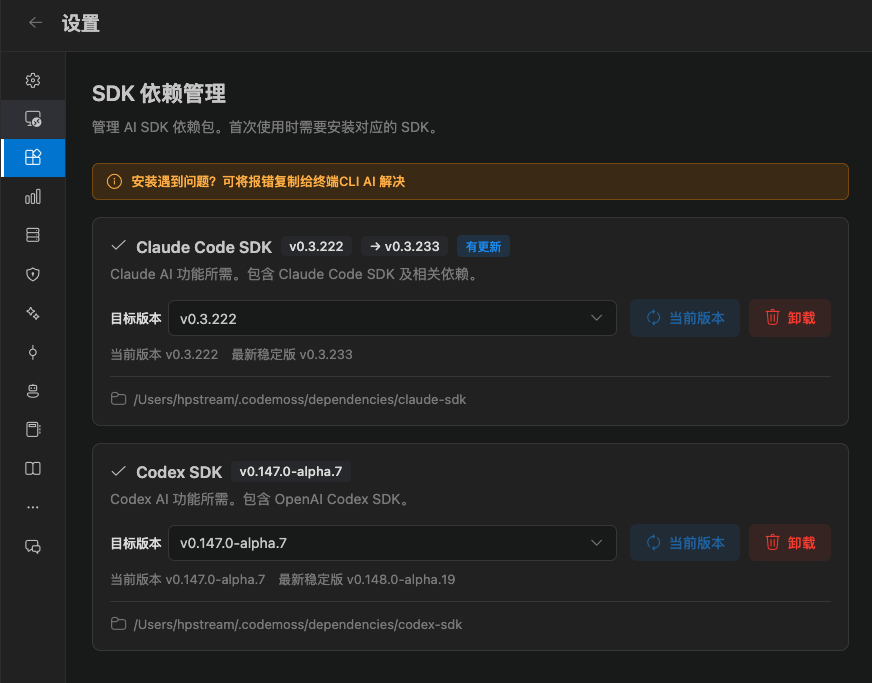
If the chat area says the SDK is not installed, click Go to install to jump to this page.
3. Install local CLIs as needed
The extension does not install Grok, Kimi, OpenCode, or Pi for you. Install each one in a system terminal, confirm the command works, then go to Settings → Provider management → CLI and click Detect again. Install commands live on each engine page:
Skip this step if you only want Claude or Codex first. For detection and PATH troubleshooting, see Detect and install.