

Claude Code
SDK, API key, local config, and login.
Codex
SDK,
~/.codex/, and sandbox.Kimi
Local
kimi.Grok
Local
grok.OpenCode
Local
opencode.Pi
Local
pi.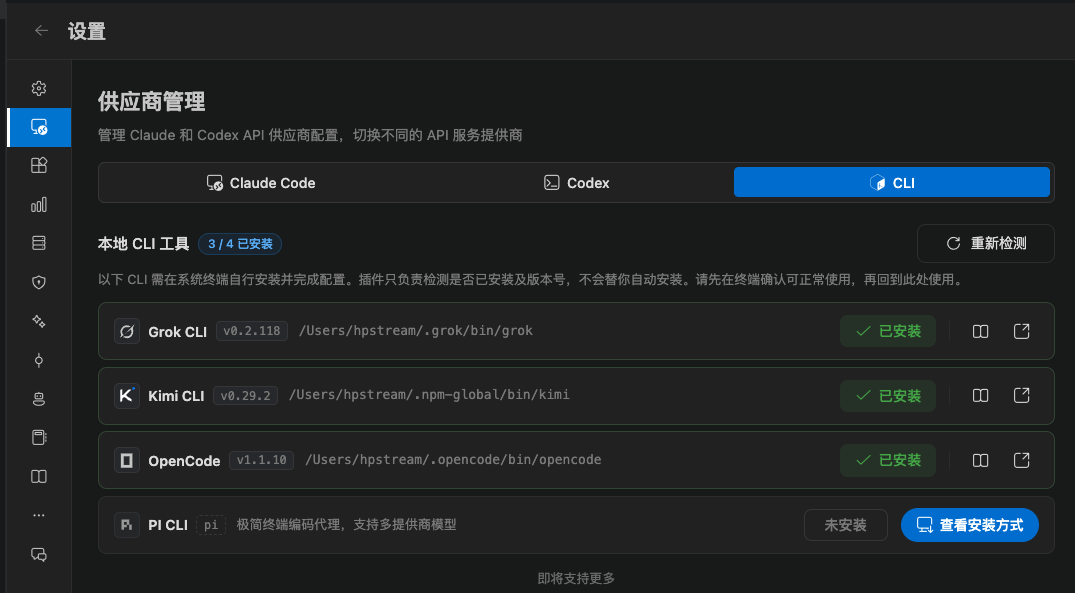
Workflow
1
Install in a system terminal
Open Terminal, iTerm, or PowerShell, and install with the official command on that engine’s page.
2
Confirm the command works
Open a new terminal and run
grok --version, kimi --version, opencode --version, or pi --version.3
Detect again in CC GUI
Open Settings → Provider management → CLI and click Detect again.
4
Switch the provider in the input box
After the status becomes Installed, pick that provider at the bottom of the chat and ask a question.
If detection fails
- Open a new terminal and confirm the binary is on
PATH - VS Code launched from the Dock / Start menu sometimes cannot see the terminal
PATH. Add the install directory to the system environment variables, then restart VS Code - Point to the binary with an environment variable:
GROK_BIN,KIMI_BIN,OPENCODE_BIN,PI_BIN(also accepts*_PATH/*_CLI_PATH) - Go back to the CLI page and click Detect again
- Turn on Settings → General → Behavior → Debug log, then read the detection log in Output → CC GUI