After you install the app, you still need at least one working AI runtime and a project workspace.
1. Understand the dependencies
The desktop app is a full application. You do not need VS Code or IDEA.
Chat still depends on a local runtime:
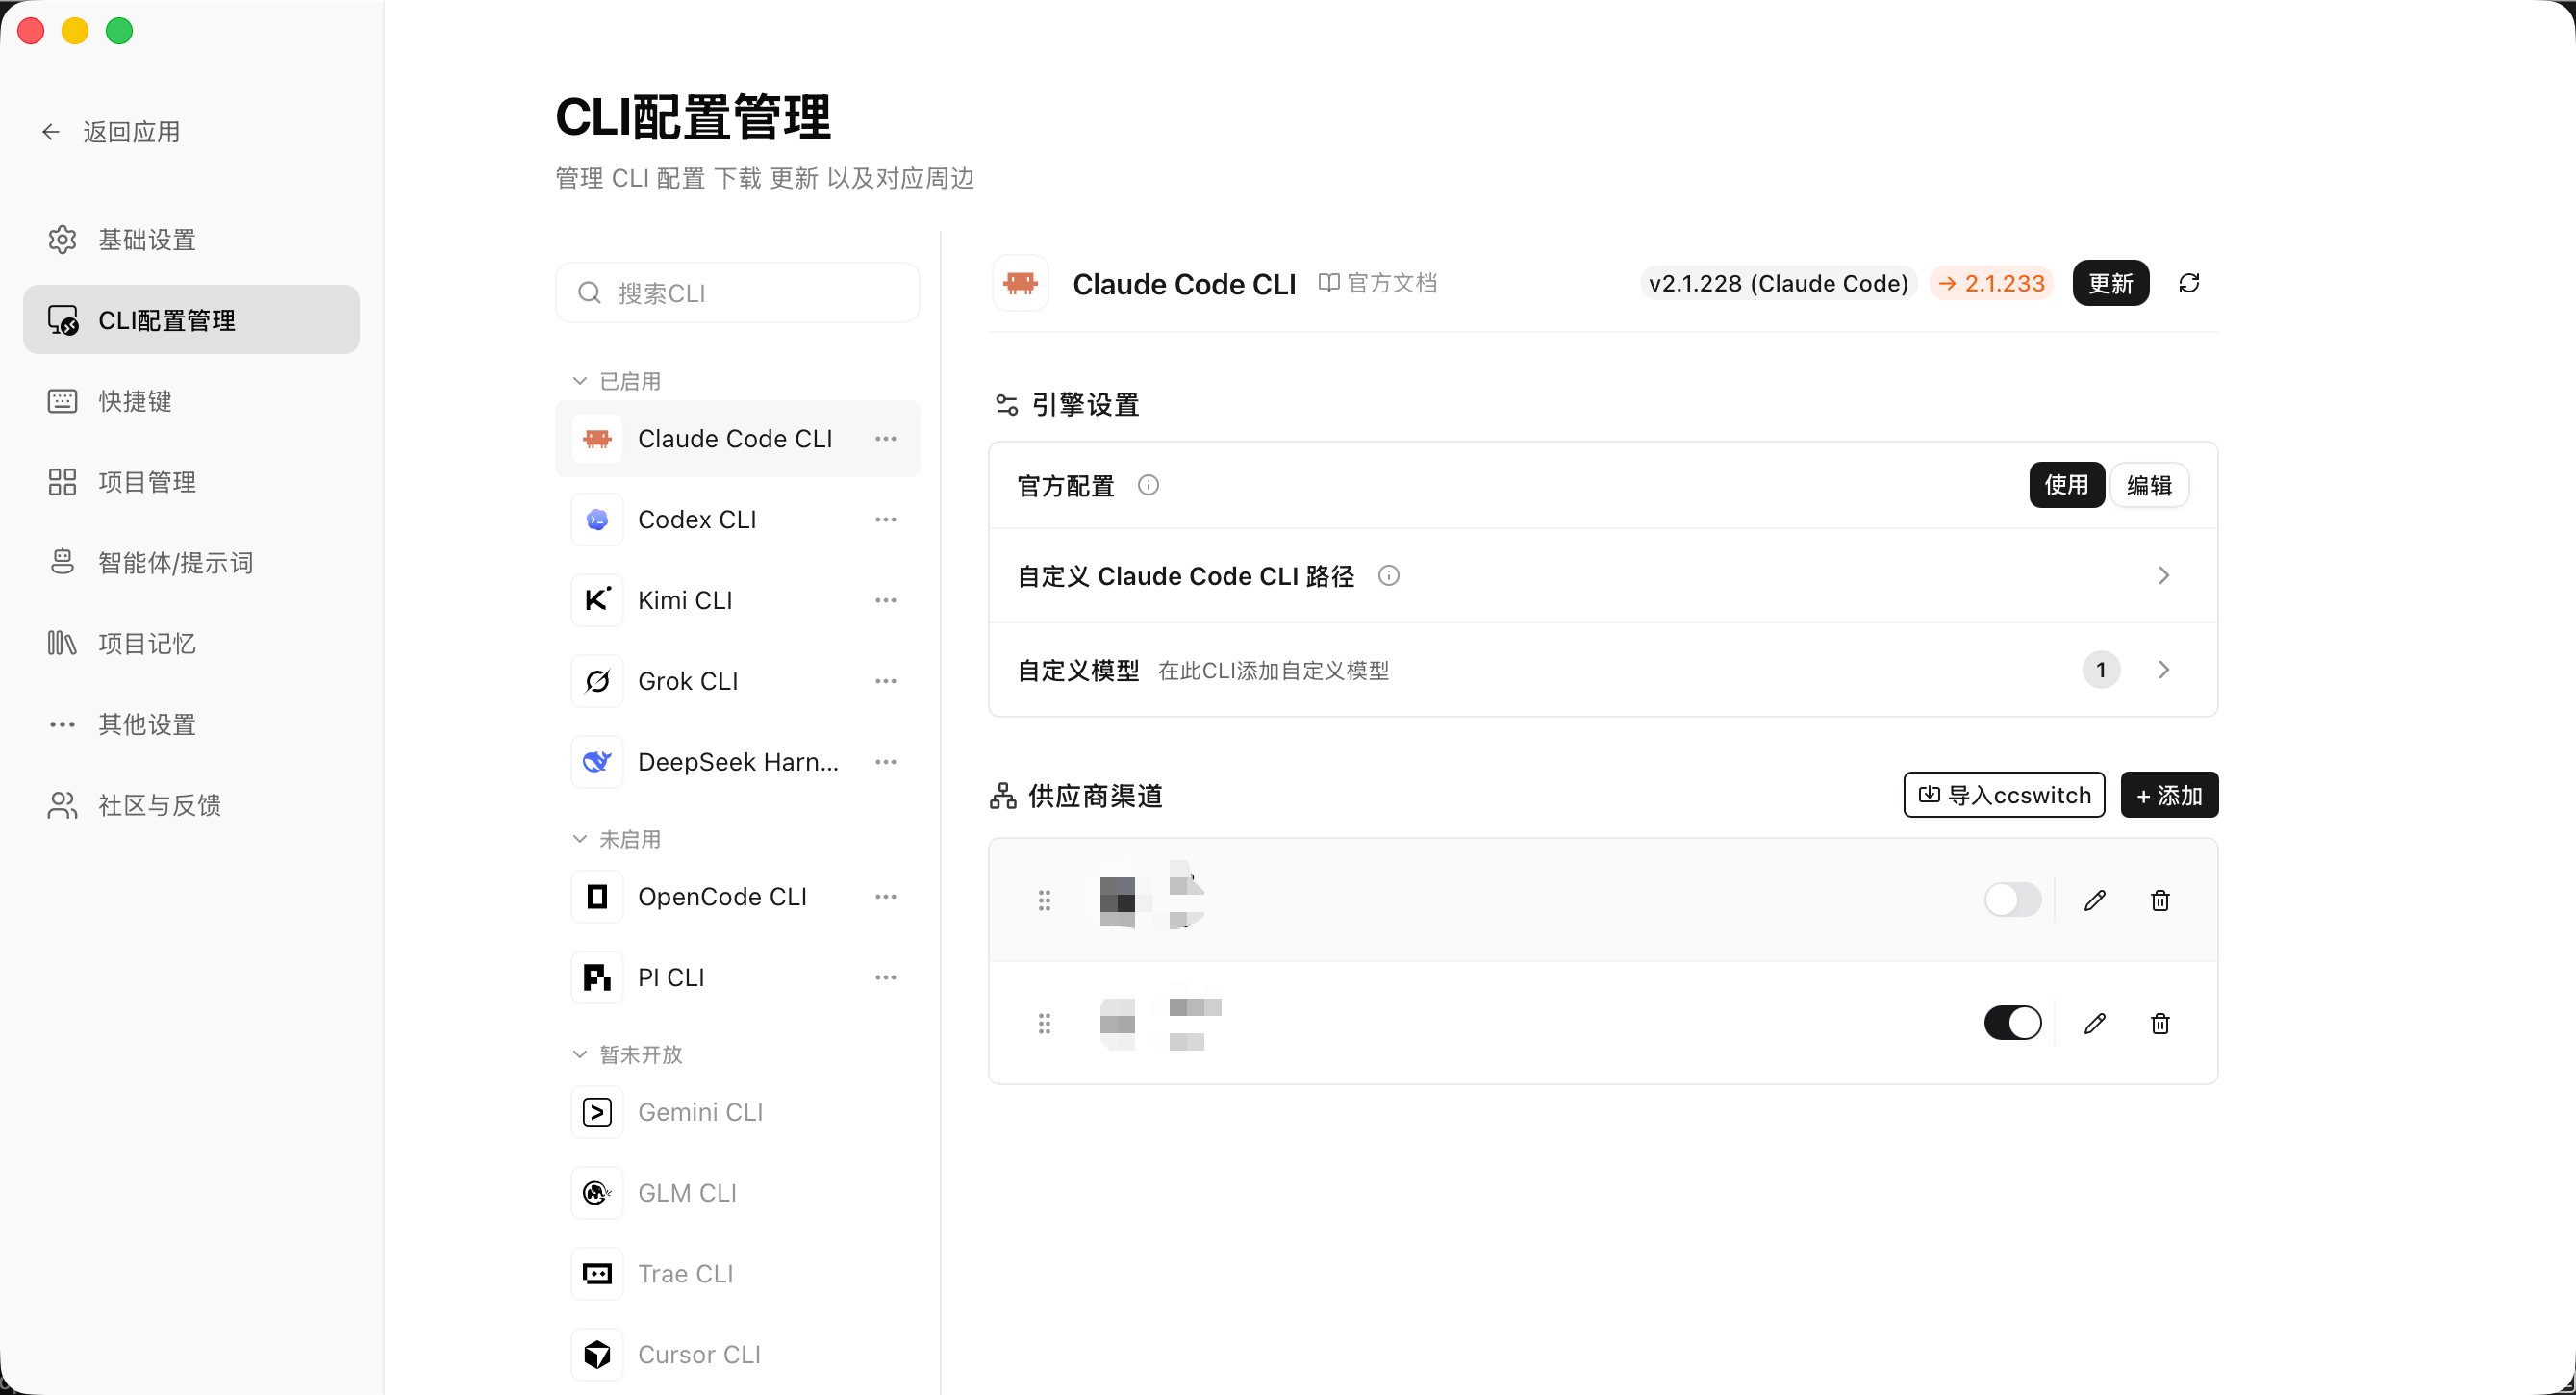
Open Settings → CLI configuration (providers) to see detect status and install notes. Available engines and Coming soon items appear in separate groups.
Open Settings → CLI configuration. The left list is grouped as Enabled / Disabled / Coming soon. Open an engine to detect its version, install or update the CLI, and configure credentials.
Available engines and Coming soon entries both appear. If Gemini, Cursor, Copilot, Qwen, or similar sit under Coming soon, do not configure them as shipped runtimes.
Claude Code
Codex
Kimi
Grok
OpenCode
Pi
DeepSeek Harness
- Add a hosted provider: name, API key, base URL, model mapping
- Or use local
~/.claude/settings.json / CLI login
- Official direct traffic goes to Anthropic; third-party presets (Zhipu, Kimi, DeepSeek, OpenRouter, and others) route to their endpoints
- Hosted profiles live in
~/.ccgui/config.json
- You can override the Claude CLI path
- If it is not installed, click Install on that page, or install from the terminal commands on the engine page
Details: Claude Code.
- Add a provider; config is written to
~/.codex/
- Or use local
config.toml / auth.json
- For a subscription account, run
codex login in a terminal first
- You can add custom models and message / MCP environment variables
- You can override the Codex CLI path
- If it is not installed, click Install on that page, or install from the terminal commands on the engine page
Details: Codex.
- Use local
~/.kimi-code/config.toml (override with $KIMI_CODE_HOME)
- Or add a third-party provider: name, base URL, API key, model. Enabling it writes that
config.toml (backed up first as config.toml.bak)
- Provider types: Kimi Code official / OpenAI-compatible / Anthropic-compatible
- Quick presets: Kimi Code (official), Moonshot Open Platform
- You can override the Kimi CLI path
- If it is not installed, click Install on that page, or install from the terminal commands on the engine page
Details: Kimi.
- Use local
~/.grok/config.toml (override with $GROK_HOME)
- Or add a third-party provider: name, base URL, API key, model. Enabling it writes that
config.toml (backed up first as config.toml.bak)
- API backends: Chat Completions / Responses / Messages (Anthropic)
- Quick preset: xAI (official)
- You can override the Grok CLI path
- If it is not installed, click Install on that page, or install from the terminal commands on the engine page
Details: Grok.
- Use local
~/.config/opencode/opencode.json ($OPENCODE_CONFIG wins)
- Or add a third-party provider: name, base URL, API key, model list. Hosted providers use env injection and do not change
opencode.json
- Quick preset: OpenCode Zen (official)
- You can override the OpenCode CLI path, or move this engine to Disabled
- If it is not installed, click Install on that page, or install from the terminal commands on the engine page
Details: OpenCode.
- Auth lives in
~/.pi/agent/auth.json (mode 0600)
- You can enter API keys for Anthropic, OpenAI, Gemini, DeepSeek, xAI, OpenRouter, and others
- For subscription auth, click Log in: the app opens the built-in terminal, starts
pi, then sends a command such as /login anthropic. You can also run pi /login in a system terminal. The app does not run OAuth for you; it only reads auth.json
- Resolve order:
--api-key → auth.json → environment variables → models.json
- You can override the Pi CLI path
- If it is not installed, click Install on that page, or install from the terminal commands on the engine page
Details: Pi.
- The app connects to a local DSH host. It does not take another API key
- Set Host (default
127.0.0.1) and Port (default 3080)
- You can turn on Auto-start host
- Configure models and API keys in the DSH Web UI. Click Open DSH settings
- You can override the DSH binary path
- If it is not installed, click Install on that page, or install from the terminal commands on the engine page
Details: DeepSeek Harness.
Full notes for each engine are in the sidebar Providers / CLI group. Detect and PATH troubleshooting: Detect and install.
API keys stay on this computer. Mask them before you screenshot or record.
3. Install CLI
The app does not silently install any CLI. In CLI configuration, click Install / Update (it shows a plan first, then runs after you confirm), or install in a system terminal and come back to Settings to detect again.
Install commands live on each engine page so this page does not copy them:
Failed detects, PATH, and custom paths: Detect and install.
4. Config paths
5. Add a project workspace
The app organizes sessions and files as a workspace / project:
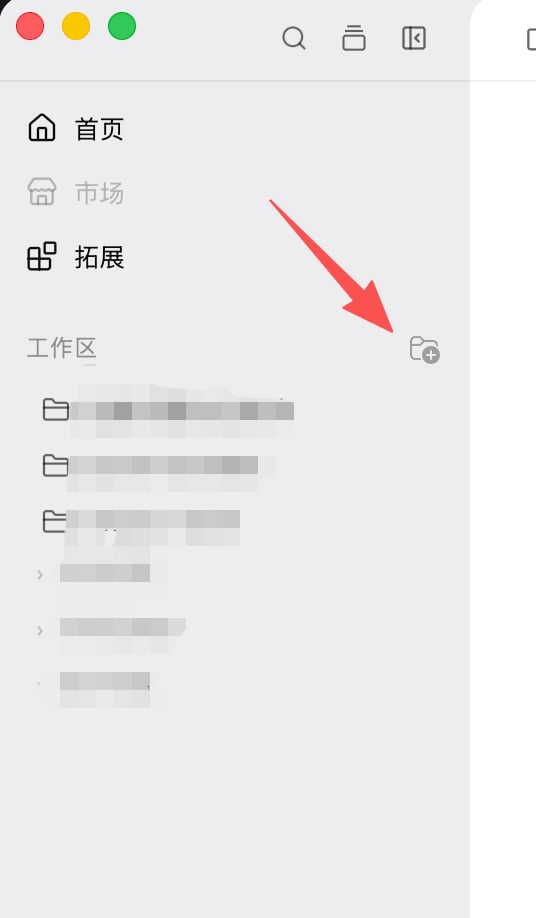
- Open Home
- Click Add project
- Choose a local folder
- Confirm to enter that workspace
Without a workspace, file references, the Git panel, and project memory have no root.
6. Auto-update
The app has a built-in updater. It reads latest.json from GitHub Releases. When a new version is available, follow the prompt to install.
Next: Send the first message.